Showing posts with label Tile Doc. Show all posts

Saturday, May 17, 2008

Tidying the Garden

NOTE: got a card reader (a weency little disk drive), and am now able to extract my photos--have added some to this entry--25 May 08
No pix for now.
So annoying--my old laptop developed (again) that electrical problem that caused such havoc a few years ago (when it was under warranty)--they replaced the power brick, the battery, the motherboard (three times!) and finally the hard drive. Now it's out of warranty, and at the august age of 4-1/2 years, it's too obsolete to be worth repairing. Ug. So I got a replacement (and it's bright green!), but now my camera won't talk to my computer because my camera's too old and my computer's too new. It isn't a driver problem; Canon says I'm just SOL.

Ultimately, the solution is a new camera (fortunately, they've come down in price quite a bit), but for now, I think I have to take my memory card into some photo place somewhere and have them extract my pix for me. So that's tiresome. Until I get around to that, we'll be doing a text-only blog around here. I'll try to be really descriptive to compensate.

Meanwhile, Aunt Pauline, Big David, and Granny Babe are coming up to visit the house while they're in Texas for my brother's wedding. I'm really pleased to be showing the house off to the Fuldas, as they've been such an enthusiastic and supportive audience for this house endeavor--I'm tickled they'll finally get the chance to see it in person. So we're trying to get everything all tidy and genteel before they get here.

Update on the Tile Doc
It worked! Instead of being gooey and disgusting for months on end, it dried nicely within about 8 hours, let me apply three separate coats, and is now bone dry and functional. You can see the brush strokes, so you're likely to walk in my bathroom and think "Hey, they did something to that tile!" But what you WON'T think is "Hey, is there a hideous shade of grey under that creamy-white epoxy?" Because you can't see the hideous shade of grey! And that's really the main thing we were going for.
This is the backsplash after 2 coats of Tile Doc. We added a 3rd, so now it's pretty solidly white.
Garden-intensive day
We picked up the three Mutabilis roses we needed to complete the hedge at the head of the driveway, as well as a bunch of mulch and some more edging. (So are you finally done with the edging? I hear you ask. Not on your oliphant. Just another installment in our long-term metal edging payment plan, thank you very much. We're on the 30-year edging installment schedule.) For some time, we've had 2 Mutabilis roses separated by a wide swath of weedbarrier. Since the weed barrier wasn't mulched, the weeds don't really seem to have felt too terribly inhibited. When I cut Xs in the barrier to plant the roses, masses of bright green weeds erupted from the holes. So learn your lesson, plant people. Weed barrier without mulch is not merely unsightly, it's also barely functional.
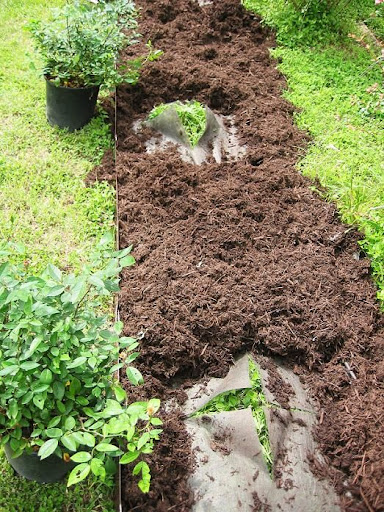
Masses of weeds, bursting through the slashes cut in the weed barrier

And we mulched the bed by the sun patio (a bit bare right now--just a Clerodendrum ugandense, a variegated hibiscus, a jasmine, a plumbago--and lots of empty patches). This bed's moment hasn't yet come for edging. I also put liquid seaweed on all the roses and a favored few other plants. I'm not familiar with the product--we'll see what it does.

And I put a little fungicide on 'Wild Blue Yonder,' 'Reine des Violettes' (which violently resented being transplanted), and 'Graham Thomas' (a modern, and therefore somewhat whiny). Oh, and also 'Autumn Damask'--it has this really screwy grunge on its leaves. Not black spot, not powdery mildew, but brownish, angular necrotic patches. I think the angularity may indicate a virus, but I'm hoping that I've mis-remembered my plant pathology (I got a B in that class, darnit.) It bloomed like mad this spring, so perhaps this problem isn't too serious, whatever it may be.

And finally, I potted up some plants for the patio--our tall, bamboo-green pot got some purple sweet potato vine, and the cute little angular succulent I got at Yuccado (name has slipped mind) went in a lavender pot. So we look stylish and funky, I hope.

Interesting Aside
The family across the street haven't parked in our yard in well over a week; possibly longer. I don't know how to interpret this--is this intended as an olive branch, or is it just a coincidence? Whatever it is, I'm grateful for it, so I'm declaring a cessation of hostilities (said hostilities consisting pretty much entirely of griping about them in this blog). No more unkind epithets or disgruntled speculations. Perhaps we, collectively, are turning over a new leaf.

Sunday, May 4, 2008

Those Who Cannot Remember the Past...

For some reason, I've been dallying with TileDoc again, the maddening epoxy product that is, apparently, designed to cover one's bathroom surfaces in a perpetual layer of foul-smelling sticky white goo. You may remember my many struggles to re-finish our guest pedestal tub (for the full, harrowing account, see previous entries "In Which I Inhale a LOT of Epoxy," "Tub, Shelves, Groundcloth, &c. &c.," and "Success! At Last!").

The problems with TileDoc are 2-fold: 1) it goes on best when aerosolized, which is difficult to accomplish without a power sprayer and air compressor, and 2) it only actually dries when it's applied during a full moon when Uranus is in the House of Leo and the solar winds are unusually high. Or something. The not-drying problem is, itself, 2-fold: a) you must measure the two components very, very, very accurately (I recommend filling a pyrex measuring cup with 1/4c of water, pouring the water into the intended epoxy receptacle--such as an old salsa jar--and marking the water level with a sharpie. Repeat with a 2nd quarter-cup of water so that you have 2 sets of markings on your jar. Then pour the clear, sticky stuff first to the first line and the white, opaque stuff to the second line. but given my success rate, you may not particularly care to take my advice.) And b) you must coat the surface with the faintest possible sheen of the stuff. This latter can be extraordinarily difficult to do. I have no advice for you on this subject, other than Be strong!

Anyway, I've embarked on this dubious endeavor because I just can't stand the stupid grey tile backsplash above our sink one second longer. We got the bathroom looking more or less genteel and tamed--at least if you squint--and the anomalous backsplash really wrecks our groove.

Note the pointlessness of the grey backsplash

Also, we have guests coming at the end of May, and I'd like to hide our tessellated shame. We haven't the resources (cojones?) to do anything about the much larger expanse of hideous grey tile (and its repulsant sidekick, Moldy Old Caulking) in the shower surround, but we DO have an opaque shower curtain, so that problem's handled. It was time, however, to take care of business where the backsplash was concerned.

So I painted the stuff on with a brush about 4 hours ago. It's still tacky (in both senses--it will need at least 2 coats to adequately hide the grey), which strikes me as a bad sign. On the other hand, it's drier than it was before, so perhaps there's hope?

Oddly enough, the corrosive, chemical odor of the epoxy made me feel strangely nostalgic. The human subconscious--or at any rate, my subconscious--works in very, very peculiar ways.

New TV
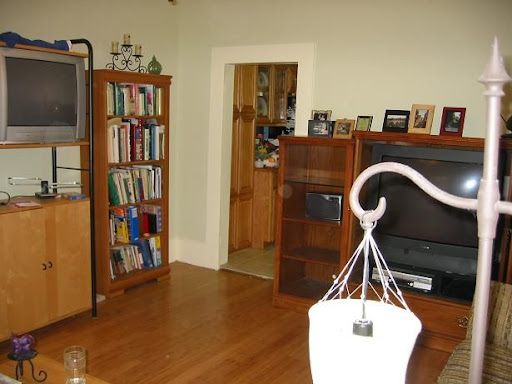
...And on to things that do work. Mom & Dad just got the New Hotness in terms of TVs, and they kindly gave us their old TV, the Old Hotness, which, by Matt's & my standards, is an utter leviathan and a fancy one at that (back off, would-be thieves--it's about 15 years old and weighs more than Mount Rushmore. You've never be able to get it out of the house. Plus it's not digital-compatible.) They also gave us an entertainment center to put it in (nice parents!), which is also no featherweight. Many people, including hired help, a benevolent neighbor, and my brother, combined their efforts to extract the units and get them into and out of our Jeep and trailer.

In any event, it's now reposing in electronic glory in the den, plugged in, re-programmed, and ready to go. Thanks to its superior antenna, we now get two PBSes, two CBSes, and (¡que suerte!) four Spanish channels. We watched a DVD on it last night, and everything was all crisp and lovely and, you know, big. No more squinting to read subtitles.

The funny thing is that we haven't figured out what to do about the old TV, so we are now not merely a four-TV family, but we have a two-TV living room. And in case you wanted a quick headcount, the residents here are (1) me, (2) Matt. In our defense, 1 TV is halfway dysfunctional and lives in the garage, 1 is our wee little kitchen TV, and 1 is the usurpee, probably fated to take up residence in the crawlspace under the stairs. Still. 4 TVs. 2 people. Livin' the Costco lifestyle, my friends.

For a truly immersive multimedia experience

Other Long-Term Projects

But what, you may be wondering, happened to the porch swing (meant to be our Valentine's Day present) How about those antique doors and knobs? The shade patio? The hedge of mutabilis roses to replace those scraggy abelia? The other hedge to hide Mr. Ugly Car and his opprobrious cohabitants? Quick summary:

(1) The bolts that I bought for reconstructing the porch glider are too short for the thicker pipes (part of the dismembered hurricane fencing from the back yard) that we're using to replace the rusty original supports. So I need to trek out to Austin Bolt Company, whom I utterly adore but whose hours of operation are problematically short, and exchange them. But the frame is rustoleumed and ready to go, and the new red oak slats are stained and varnished with 3 coats of spar urethane for protection.

(2) "Greg," the last of our new (old) doors is at Elgin Furniture Refinishers getting stripped. Next time we're in town during their operating hours (probably next Sat), we'll pick him up. We need to get in touch with Javier (the dude who built our lovely shelf/drawer unit in the study) to get his estimate for sizing and hanging them. I suspect that he's been hesitant to call us because it'll be a fair pfennig. Ouch.

(3) Re the shade patio (for latest pix, see "The Patio, & More Flower Pictures"), Mom & Dad very nicely gave us some ooftish for our 5th Anniversary (yesterday--Happy Anniversary to us!), which we will take to Lowe's to convert into metal edging. We'll install it around the current configuration of pavers, lift up the stones, and put down some sand. We may have enough from the old sandbox on the property, or we may have to buy a few bags. Then we'll reinstall the pavers and cap them off with a little cement.

(4) Re the mutabilis hedge (meant to stand at the head of the driveway and give our back yard a little privacy), well, the two roses we planted last year are doing nicely. But there's a huge gap in between them where we need to plant 3 more, so we'd be flattering it if we even described it as "spotty." The four abelias remain in their original locations for the time being. It would probably be foolish to move them this late in the year. We're going to plop them around the shade patio, but if a few croak, there are plenty of nicer shrubs we can substitute in (especially oak-leaf hydrangea and American beautyberry). Even so, I'd feel kind of slummy about killing all four. So the abelia relocation is postponed. But I'm willing to plant mutabilis as late as June of this year (it's that rugged), so we may at least get that part going soonish.

(5) Mr. Ugly Car's hedge--Matt was given some second-hand primrose jasmine (Jasminum mesneyi), so we've planted a line of them inside our property line. They're puny now, but we plan to water and fertilize the bejeezus out of them, so hopefully they'll be quite sizable next year. Primrose jasmine makes a rather massive fountain of light-colored evergreen foliage. I don't actually think they are the absolute best choice in landscape design terms--they look too much like the grass below and the ash above in color and even leaf shape, and they don't have a lot of definition--but they smell delicious and they'll accomplish our primary goal. And they were free, which is one of my favorite adjectives ever.

Tuesday, November 27, 2007

Success! At Last!

Tubly Triumph
Sweet success!

I finally got the epoxy to dry properly, so the upstairs tub is finally, finally, finally done.

Over the course of this deeply frustrating project, my standards have gotten lower and lower and lower. I used to worry about evenness of coverage, getting the color to match the woodwork, smoothness of texture, et cetera. Now my standard for success is "Is it dry?"

Which--huzzah!--it is! Blotchy and (oddly) variably shiny, but still--dry!

Matt is as tired of hearing about this project as I am of working on it, so he suggested that we leave it as is and consider having the tub professionally refinished a few years down the line. This seems like an eminently sensible solution. In the interim, the tub is completely covered, and it's nice and clean. Welcome, guests. Soak long, soak deep.

The dazzling adequate new tub finish.

Ashes to Ashes (heh)
In other news, we've been chopping and burning the remains of that ash tree. (Matt's been doing all the manly chopping; I've been doing the twiggy, dainty, chopping. From each according to her ability...) I think I've never really given ashes (messy, short-lived, limb-dropping) the respect they deserve. They are hard. Matt's ax keeps bouncing off of the wood. And they burn hot and bright. Thus far, we've been having very utilitarian fires to try to reduce the huge piles of twigs in our yard--we haven't really had the time to sit and enjoy, which is a shame--the weather's just right for it: snappy, but not bitter. (When you're burning a twig fire, you have to keep feeding it incessantly, so there isn't much time for zenning out with a mug of hot chocolate.)

Towards a New Chandelier
Matt's also been spearheading the chandelier installation initiative. It's been vexatious, but we've finally got the wires sorted out and poking through the right holes. We just need to buy a special screw and everything should come together. (However, there will still be a big hole in the ceiling where the fan used to be. Eh, well. We'll deal with that eventually.) The chandelier will be attached to a dimmer switch so--oooo!--mood lighting!

Master Plan
And finally, I've committed our long-range landscape plan to computer. Matt & I have had countless garden planning conversations, with hastily scrawled diagrams drawn on odd pieces of paper, and we never remember what decisions we reached or where exactly everything goes. So here it is: the master plan (click for a legible size).


Our Master Landscape Plan

The pink is crushed granite to be used for new walkways and to improve the weed-ridden driveway. Orange plants still have to be bought; blue plants will be transplanted from their current location to the spot indicated on the map.

Key:
W = White oak
L = Lacey oak
CM = Crape myrtle
M = 'Little Gem' Magnolia
BC = Bald cypress
J = Juniper
R = 'Forest Pansy' redbud (purple-leaved)
P = Persimmon
B = Bur oak
Li = Ligustrum
S = Eve's necklace (Sophora sp)
CP = Chinese Pistache
R = Red oak (Q shumardii/texana)

Sunday, September 30, 2007

Prettifying

This weekend we squeezed in some long-awaited prettification.

We bought some baseboards for the master bedroom. Unlike the front rooms of the house, with their 9" plank baseboards, the back rooms don't require freakishly tall moldings. Since planks-as-moldings have some significant problems (they're hard to cut straight and they're weirdly thick), we wanted to go with more traditional baseboards here.


As you can see, thanks to some holes and other imperfections in the walls, we did still need some height. And the fact that the ceilings are so high means that we need baseboards that are in scale. Below are the boards we ended up with. I think Matt's right that they're a little too elaborate for the style of our house, but there weren't any other >4 1/2" options.


We ran into difficulties cutting these boards, too--they're too tall for our miter saw, and, we realized, we're going to have to bite the bullet and replace a crunched piece of wallboard before trying to install baseboards there. As a result, we got exactly 2 pieces of baseboard nailed in; the rest to be added later after corrections and modifications have been made.

Death to Preval
I found the two missing air vents (master bed and study), so I decided to spray them to match the ceiling, as I had done with our other 5 vents. I got out my trusty Preval paint sprayer and... nothing came out. Change canister, repeat... nothing. Thin paint further, change canister, repeat... nothing. Blow out the plastic straw, disassemble the cartridge, and scrape out all orifices with a twig, repeat... nothing.

I know I've said it before, but this time the iron has entered my soul. No more Preval today, no more Preval tomorrow, no more Preval forever. The product is a menace. I ended up painting the vents with a brush, which of course means a thicker and more texturey finish than a metal air vent ought to have. Next time I need to convert a paint to spray, I'm going the whole hog and buying a sprayer and air compressor.

(Note: for the benefit of any Feds who may be trolling the backwaters of the internet in search of potential domestic terrorists, I meant "Death to Preval" in the rhetorical-flight-of-fancy sense, not in the stockpiling-fertilizers-and-disassembled-cell-phones sense. Peace, out.)

Bit... by... bit...

Matt installed our new fixture in the bathroom. It's brushed nickel--so nice! And it matches our new facet, our stylish drawer pulls, and the frame we bought empty that will someday hold a mirror (picture to come later).

We still need to buy glass shades for the fixture, a mirror for the frame, a vent/light combo, and to refinish the tub. I'm kind of amazed at the quantity of work we've lavished on the bathroom. How, after this much money, energy, and love, the thing has the nerve to not be finished, I'll never know.


Here Matt is after having moved the electrical box. You can see the white strip where the hideous old wooden bar of "Hollywood-style" lights used to be. (By "old," I mean from 1985. Not "old" in the sense of charming, quaint, or delightful.)

Weed barrier!
While he was wrestling with that (and an intransigent project it turned out to be--apparently, the colors of the wires are all wrong, making hooking them up a real challenge) I worked on putting down more weed barrier. Our gazebo is ultimately going to have an herb & wildflower bed around it. For the moment, it's mostly just got the ratty leftovers of the rest of the garden--the sickly Will Flemings we brought from Wolverton, a pitiful convalescent Climbing Peace (we don't even like hybrid teas) and a miscellaneous collection of sulky rosemary and reject peppermints and lemon balms from Matt's old nursery.

Hopefully, the weed barrier will give a little assistance to some of our weaker plants. If nothing else, it will keep the area a little tidier until we can begin to work it properly. Next spring: larkspur, poppies, basil, and oregano!


We also have a half-hearted little bed with a few roses by the light pole. I weed-barriered that, too, just to tide it over until we can really kick it into shape.


Finally, here's Matt's little hobby greenhouse, built right on top of our horrible oubliette.

Tuesday, August 14, 2007

Tub, Shelves, Groundcloth, &c. &c.

We have been very energetic lately.

I touched up all the scuffs and smudges (that I could find) on our walls and doors, stripped and varnished a book shelf, and painted the outside of the pedestal tub. Also, Matt & I installed more metal edging and put down weed barrier.

Painting & Varnishing

The first two were pretty straightforward. Here's what's worth mentioning:

1) I impulse-bought a little bucket from Sherwin-Williams that is made for touch-ups. It has a special little lip so that you can scrape the excess paint off your brush without it going down the outside of the bucket; it has a magnet to hold your brush in place when you aren't using it; and it has a rubber handle that fits snugly over your hand.

The result is that you can carry it all over the house to make touch-ups without every dripping or spilling--it's a miracle! I was actually annoyed at the time of purchase--I had wanted just a cheap-o plain bucket for the task, not this fancy-pants professional-grade bucket with all the special features. However, there were no cheap-o buckets available, and as it turns out, the special features are killer. Love this bucket.

2) I bought a stain/varnish combo for the book shelf (which is an attractive but chintzy item that we got second-hand and originally came from Target). I didn't think it merited the complications of first staining, then varnishing. On a scale of 1 to 10, I'd give the varnish something like a 7.8. It's easy to use, but in the miserable sauna that is our metal garage in August, the varnish tended to a slight gloppiness.

Also, in order to get a somewhat even finish, you have to apply 3 coats, which is annoying. And finally, it instructed me to use steel wool between the 1st and 2nd coats. But steel wool leaves little steel fuzzies which apparently hang suspended in the air until you put down your next coat of varnish, at which point they materialize out of nowhere and leap on the wet lacquer all at once. Most aggravating. Still, for refinishing second-hand bookshelves from Target, it's all right. And if I'd used sand paper instead of steel wool, I'd have given the product an 8.6

Chintzy but attractive bookcase. Original finish was chipping off. Sanded & refinished.

The Tub Rebels

The tub is... more difficult.

Stuff I learned about tub epoxy:
1) Really, really, really don't put it on too thick. If you do, it may never, ever dry.
2) If you have glops or imperfections, rub at them with a xylene-soaked rag sometime before they're 100% dry--xylene dissolves partially dried epoxy.
3) Buy the air canisters in bulk if (like us) you idiotically opted not to buy a power sprayer.

I ended up rubbing off the bits that kept not drying; hopefully by now (2 days after the xylene and about 2 weeks after initial application) the tub's first coat will be dry, if very uneven.

I painted the outside of the tub a darker shade of the wall color, although Matt (presciently) implored me not to. It isn't that it looks bad--it just doesn't look at all exciting. I had thought it would be really zingy. Alas. The color wasn't as pretty as I expected, and it has surprising nautical connotations--if the Navy had pedestal tubs, they would probably paint them this color. It's not terrible, just... meh.
Oddly institutional grey-blue of our pedestal tub. Oh well.
I dunno--maybe when I install a new shelf and cabinet, and add the bathmath, and so on, it will all pop into place. Maybe.

Taming the Front Bed

I'm quite happy about the week barrier. The roundup worked a treat on the burmudagrass, so now we're covering their browning corpses to prevent them from ever returning again. Later, we'll mulch on top of the weed barrier. Hot work, though. Not hard work, per se, just hot--I absolutely rained sweat.

The brown bits are the dead bermudagrass--Mwahahaha!

But the steamy outdoor work gives me a proper appreciation for our front porch, which is nice and shady and even catches the odd breeze. It's surprising how much a variance of a few degrees matters--you would think everything over 95F would just be bad, but actually, when you go from our oven of a garage out into the yard, you'd swear the outdoors was cool and delicious. And when you go from working in the yard to our shady porch, that 98-degrees-in-the-shade is remarkably refreshing.

Tuesday, August 7, 2007

In Which I Inhale a LOT of Epoxy

Tonight I finally began a long-anticipated project: the resurfacing of our upstairs pedestal bathtub (ca. 1920-30). Our guest room has this wonderful old tub, rather like the one below, only dull, dinged, stained, and with a very unattractive tap. Just to clarify the intrinsic--if currently obfuscated--coolness of our tub, check out this reproduction, available from Restoration Hardware for the perfectly reasonable price of $4,299.00


A shinier, snazzier version of our tub

So it's a very cool tub. However, it's so scroungy, you don't really want to touch it with your bare hands, let alone your bare bum.

Rather than trying to extract the beast (which is larger than the bathroom door--we rather suspect that they moved the tub into place and then built the bathroom around it) and send it to a workshop that re-enamels your tub for you, we're doing the drastically downmarket version and coating it in this epoxy stuff:


It's called "Tile Doc," and it's an epoxy coating that you spray on top of your existing tile/porcelain to refinish it.

We're doing the guest tub first, so that we can use it during the 4 days it will take our master tub to dry.

The guy at the Sherwin Williams on Braker very sweetly agreed to tint the base for me, which meant a lot of eyeballing, adding a smidge, mixing, eyeballing, adding another smidge, and so on. It was really rather above and beyond of him. And it's so nice that he agreed to, because the color we've painted our trim and cabinets (white with a soupçon of moonglow) looks really awful paired with pure white.

Anyway, last night I prepped the tub with xylene (to take off any lingering traces of shine and to remove residues). I kind of like the smell of xylene--it reminds me of the hobby paints Dad uses for his model train. In addition, I'm told that it can be used to make meth; it's always so smart to have backup career plans. I think it can be used in explosives, as well. Versatile product.

Today I put down the first coat of Tile Doc, and let me tell you--when they warn against fumes, brother, they aren't kidding. You don't want to try talking while spraying--the stuff will literally make you gag. We had the vent going, the window and door open, and two fans blowing, and we were still swimming in a toxic miasma. The rest of the house still reeks of the stuff--I'm considering sleeping in the back of the Jeep.

Another key tip: do be very disciplined about putting down very light coats. I had problems with spraying too much, too closely, resulting in drips. You can try to soften the drips a bit while it's partially wet, but obviously it's better to avoid the problem altogether.

Incidentally, you may be wondering what kind of sprayer I used. I was only ever able to find Preval (the brand that gave me so much grief this past weekend), but I got a tutorial from the S-W guy, and either because of that or for some occult reason beyond my comprehension, it decided to work today. Very pleased about that.

I'll be putting down the next (last) layer in an hour--I'm blogging right from the thick of the action today. You are, in effect, embedded in the combat zone. Matt will be watching me, so if I keel over from the fumes, he can drag me off by the ankles. If you don't hear from us in a few days, you may want to send the police around to make sure we didn't suffocate in our sleep.

Just kidding.

Probably.

Update
Wed. a.m.

Okay--we survived the night. The 2nd coat didn't go quite as well as the first--the stupid spray canister wasn't working properly. It blew in spurts and stutters and suffered from low flow. I used a brand new air canister for the 2nd coat, too.

People. I implore you. If you ever take on this kind of task yourself, buy a power sprayer. Of course, they do require an air compressor, a fact that only serves to remind me of lost opportunities for buying useful tools back when we were bambooing. But we went through 2 air canisters last night, one of which didn't work properly, and we'll have to buy three more before this one project is finished. It'll presumably take 5 or 6 canisters to complete the master bath. Between the cost and the heartache, a power sprayer would definitely have been the prudent choice.

Nevertheless, the tub looks better this morning than expected. Because the spray flow was so low last night, the paint job came out all blotchy and we ran out of air before we had gotten through half the bottle of paint--so it was not only blotchy, but incomplete.

But epoxy is a viscous, oozy sort of substance, and I think that as it dries, it expands a bit and kind of mudges together, so it's less blotchy this morning than it was last night. Interestingly enough, it's still quite tacky, even wet. I'm not entirely sure when we'll be able to put down the next coat. But even with the splotches, it's already looking much, MUCH better, which is ever so gratifying.


Related Posts with Thumbnails